STEP 1. First Grain Grabber
1a. Roll Auger in direction of travel until outer end flight beginning point is at 12 o’clock noon.
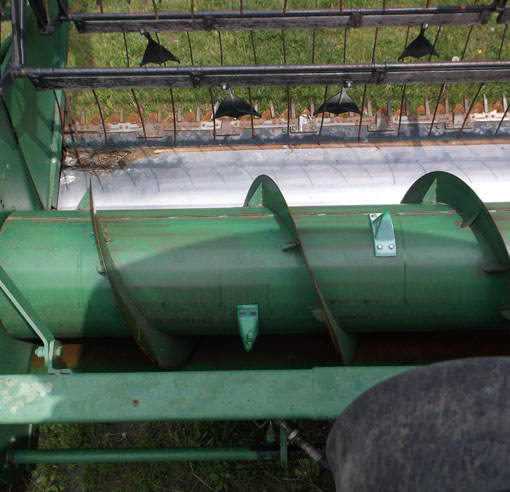
1b. Place the first Grain Grabber2 on auger tube halfway where the flight begins and the next auger flight. The Grain Grabber2 is designed with a curve which fits snug against the auger tube.
1c. Mark hole placements.
1d. Drill holes with the drill bit, included in your kit, to ensure that the self tapping screws will hold tight.
1e. Attach Grain Grabber2 with the self-tapping bolts included in your kit.


STEP 2. Second Grain Grabber
2a. Roll Auger backwards toward the combine one-quarter turn.
2b. Place the second Grain Grabber2 on auger tube halfway between the next two flightings at 12 o’clock noon.
2c. Mark hole placements.
2d. Drill holes with the drill bit, included in your kit, to ensure that the self tapping screws will hold tight.
2e. Attach Grain Grabber2 with the self-tapping bolts included in your kit.
STEP 3. Third Grain Grabber
3a. Roll Auger backwards toward the combine again one-quarter turn.
3b. Place the second Grain Grabber2 on auger tube halfway between the first two flightings at 12 o’clock noon.
3c. Mark hole placements.
3d. Drill holes with the drill bit, included in your kit, to ensure that the self tapping screws will hold tight.
3e. Attach Grain Grabber2 with the self-tapping bolts included in your kit.

The 20′ grain head requires 3 Grain Grabber2 per side. Owners of 20′ grain heads may have additional flights before the retractable fingers which do not have a Grain Grabber2.
When installed correctly, the inner most grabber, or closest grabber to center of auger on each side will go first in direction of travel, the next one out will follow, and so on so forth.
Owner of grain heads wider than 20′ only, please continue to the next step.
Step. 4 Fourth Grain Grabber2 – for 25′ to 30′ heads only
4a. Roll the auger backwards toward the combine gain one quarter turn.
4b. Place the second Grain Grabber2 on auger tube halfway between the next two flightings at 12 o’clock noon.
4c. Mark hole placements.
4d. Drill holes with the drill bit, included in your kit, to ensure that the self tapping screws will hold tight.
4e. Attach Grain Grabber2 with the self-tapping bolts included in your kit.
Step 5. Fifth Grain Grabber2 – for 30′ heads only
5a. Roll the auger backwards toward the combine gain one quarter turn.
5b. Place the second Grain Grabber2 on auger tube halfway between the next two flightings at 12 o’clock noon.
5c. Mark hole placements.
5d. Drill holes with the drill bit, included in your kit, to ensure that the self tapping screws will hold tight.
5e. Attach Grain Grabber2 with the self-tapping bolts included in your kit.
Each additional Grain Grabber2 will be installed after one-quarter turn of the auger in the opposite direction of travel.
When installed correctly, the inner most grabber, or closest grabber to center of auger on each side will go first in direction of travel, the next one out will follow, and so on so forth.

Customer Service
Monday thru Friday
8am to 3pm EST
419-272-2680
11977 State Route 49, Edon, Ohio 43518
Patent Pending
Reitzel Bros.,LTD
Corner of St. Rt. 49 & 107
Ph: 419.272.2680